Double Dragon 2 walkthrough (SNes): Mission 93 - %nomNiveau%

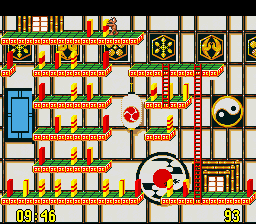
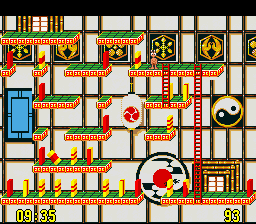
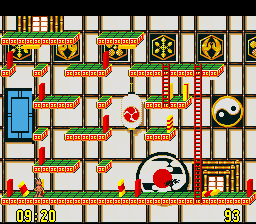
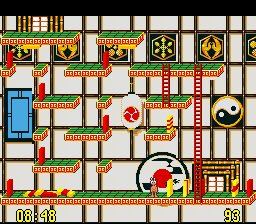
Place the tipper to the right of the explosive and push it (photo 1), then take the tipper above the trigger and place it on the floor above (photo 2), then go all the way to the bottom, take the delayer just before the tipper arrives, and as soon as the bridger has fallen, go all the way to the left with this domino to block the 2 tippers (photo 3), block the last moving tipper more tightly with the stoppers, and place the elevator and the yellow (photo 4).
| Niveau précédent | Niveau suivant |
| 1 | 2 | 3 | 4 | 5 | 6 | 7 | 8 | 9 | 10 | 11 | 12 | 13 | 14 | 15 | 16 | 17 | 18 | 19 | 20 | 21 | 22 | 23 | 24 | 25 |
| 26 | 27 | 28 | 29 | 30 | 31 | 32 | 33 | 34 | 35 | 36 | 37 | 38 | 39 | 40 | 41 | 42 | 43 | 44 | 45 | 46 | 47 | 48 | 49 | 50 |
| 51 | 52 | 53 | 54 | 55 | 56 | 57 | 58 | 59 | 60 | 61 | 62 | 63 | 64 | 65 | 66 | 67 | 68 | 69 | 70 | 71 | 72 | 73 | 74 | 75 |
| 76 | 77 | 78 | 79 | 80 | 81 | 82 | 83 | 84 | 85 | 86 | 87 | 88 | 89 | 90 | 91 | 92 | 93 | 94 | 95 | 96 | 97 | 98 | 99 | 100 |
Kart Seven translated by Claude
| Back to Double Dragon II - The Revenge walkthrough | Back to Double Dragon II - The Revenge homepage |
| Back to Super Nes home |
- Français -- العربية -- বাংলা -- Deutsch -- English -- Español -- हिंदी -- Italiano -- 日本語 -- 한국어 -- Português -- Русский -- 中文 -