Zelda Ocarina Of Time Master Quest on N64 - The Spirit Temple (Adult Link)

save

Start this temple by going straight ahead if possible. At the top of the stairs, you will need to launch a missile (Bombchu) in front of you. It will climb the wall and continue along the ceiling to blow up a large stone. Now aim upwards to catch the Hookshot target in the hole. Follow the corridor and push the block, then take the door.


You arrive in the large central room. Head to the left and climb the section of wall next to the Time Block, then take the door. Here, if it wasn't done when you were a child, blow up the rock on the wall using missiles. The chest is on the "stepped" wall (to the South). Use the Hookshot and retrieve a small key.


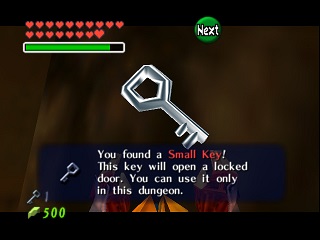
Go activate the switch to the North of the room and jump into the hole. Take the door, press the button with a hammer strike, and go back out. Note that this button makes a chest appear on the other side of the hole. You will need to become a child again to get the small key inside. This small key will allow you to obtain a Gold Skulltula (or finish the dungeon if you opened the doors in another order). Activate the switch again, climb the wall, and return to the large room. Climb the stairs right in front of you and use the Hookshot to reach the one opposite by grabbing the torch. Climb the stairs and unlock the door on the right. To cross the stairs, "hookshot" the ceiling, otherwise you will get burned.

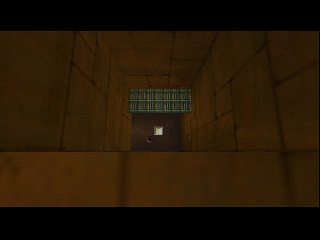


You arrive in a small square room full of holes and a bit complicated. Start by eliminating all the Beamos (sentinels) with bombs or missiles. Once that is done, stand under the Time Block and play the Song of Time. Go towards the chest and the blue button and play the song again when you are at the corner. Go back to the first location and play the song again. If all went well, there is a Time Block accessible by jumping on which rests a small crate. Take it and place it on the blue button on the other side.


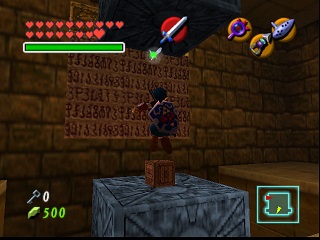
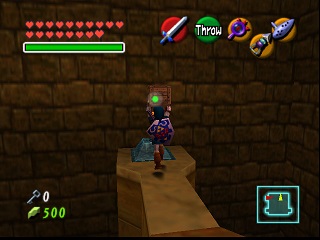
You can leave through the now unlocked door (South-East). Eliminate all the Dinolfos and go through the door to the South. In the stairs, you are attacked by an invisible hand (Floormaster). Use the Lens of Truth (Monocle) to easily win the fight. Personally, I charge the sword as soon as it's dead to kill the little hands as soon as they appear.


Take the door at the top of the stairs and defeat the Ironknuckle, it's easier with the Biggoron Sword than with the Kokiri Sword :). Pass through the door then the corridor and recover the Mirror Shield from the chest.


Turn around until you reach the Dinolfos room. In front of the Time Block, play the associated song. A ray of sunlight appears. Thanks to the Mirror Shield, reflect this ray onto the sun drawn on the wall. Play the Song of Time again to make the block disappear and go through the door. Eliminate the mummy (Gibdo) and take the Boss Key from the golden chest.


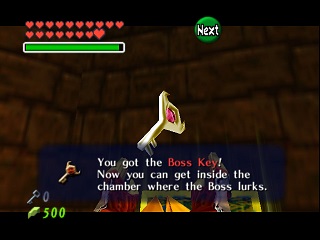
Return to the large room. To do this, in the small square room where you played the Song of Time many times, go North-West. Then follow the corridor (use the Hookshot) to arrive in the central room. There, find and light the 3 extinguished torches using your Fire Arrow. They can be seen from the chest: one to the North-West, one to the South-East (against the stairs) and one to the North-East. You can get closer to make it easier to aim.


Climb up the section of wall near the Time Block again, climb the stairs, hook on with the Hookshot, but this time, take the bottom door. Three suns are drawn on the wall and a ray comes from the top of the room. Kill the 2 Stalfos while paying very close attention to the Wallmaster (the hand called "Clapoir") that falls on you. Kill this hand as a priority to be at peace, it's a Zelda regular that takes you back to the beginning of the dungeon. Once the enemies are defeated, you will have to find the right sun to illuminate. In fact, it seems there are no "right" suns so illuminate them all while being very careful because each time, a hand falls from the ceiling, it must be killed first. Jump into the hole to the North of the room and go take the door to the South.


You find yourself in a small room adjacent to the entrance hall. Respectively in the room to the North-West and North-East, there is a Gold Skulltula. Take the rupee on your right then the one at the bottom of the stairs then break the stone and push the button with the hammer. Go quickly to take the 3rd diamond and cross the "geyser" that was blocking the passage. Finally go to the bottom of the stairs to find the last 2 gems. A chest containing a small key appears, take it.


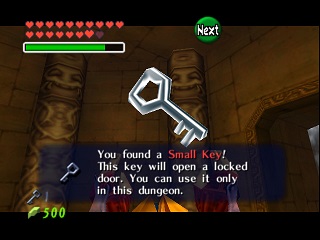
Go back upstairs with your Hookshot, cross the corridor. In the large room, you can go take the South-West door (the upper one) to look for a Gold Skulltula. Go climb the wall of the large room again, then a staircase, hook on to the torch opposite and once more, climb the staircase and take the door. Cross the corridor, take the door and this time, take the South-West door in the room where there were 4 sentinels.


You arrive in a room with a lot of height. Start by eliminating all the bats so as not to be hindered, then you will have to take all the gems. The Hookshot can frankly help you since it can hook onto the walls where Link can climb. Moreover, once the fifth one is caught and the door unlocked, you can go up almost in one go with this thing. Pass through the door and play Zelda's Lullaby on the logo. Take the door that has opened. Before that, if you take the locked door, there are 2 Gold Skulltulas.


You arrive "under the eaves" with a super mirror on the inclined part. Go down to break the 2 crates to the North-West and press the button. Climb up along the wall and take the door. For the flaming skull heads (Bubbles), use your shield to extinguish them then kill them. This room is separated into 3 small rooms, 2 of which have a rotating mirror. In the first one, use your Mirror Shield to illuminate the sun above the door. Then go quickly into the 3rd to put the window opposite the opening. Not easy because the sun doesn't reach it, try to aim well or you'll have to start all over again. Then go rotate the mirror of the second room to illuminate that of the third. If you have succeeded, the light comes out into the previous room and hits the mirror on the ceiling. Note that in the 3rd small room, there was a small key in a chest that can only be seen with the Lens of Truth near the gate. Go stand below this mirror and use your shield to illuminate the sun on the wall.


You are on an elevator that leads you to the main room. A final trap awaits you here as a hand falls on you, avoid it and kill it. Then place yourself in the circle of light and use your shield to "burn" the "sand face" of the statue. Use your Hookshot to reach the gate that was hidden behind the face and pass through the boss door.


The Spirit Temple (Adult Link) - Boss : Evil Duo, Twin Sorceresses (Koume and Kotake)
The meat grinder (Ironknuckle) is actually Nabooru apparently under the control of the 2 sorceresses. Thanks to you, she regains her senses and tries to flee but the 2 sorceresses launch a magic attack on her and the Gerudo disappears. Open the 2 doors behind the meat grinder's throne and climb onto the giant platform in the boss room to see the 2 sorceresses appear. The fight will be divided into 2 parts, equip yourself with the Master Sword.


In the first part, the 2 sorceresses attack you and you will have to reflect the attack of one onto the other. For this, place yourself on one of the small platforms and use your shield. Two methods are available to you: manual aiming and automatic aiming. The first is done by placing yourself in front of the attacking sorceress and pressing R. Then aim at the other sorceress with the stick. For the "automatic" method, you will have to aim at the sorceress who is not moving while keeping your shield in front of the other. I strongly recommend manual aiming which is less dangerous because in the second method, if the sorceress you are aiming at passes behind you, you will be hit from behind and the attacks hurt very much. However, in some cases, this 2nd method can be effective.


After hitting one of the sorceresses 3 times, Koume and Kotake merge into a large sorceress who can launch either fire attacks or ice attacks. The goal of this phase is to absorb 3 attacks of the same type with your shield. Once done, your shield will reflect everything back at the sorceress. You will then have to run onto the platform and hit her with your sword (for this occasion, change your sword and take the Biggoron Sword). Repeat the operation several times (if you have absorbed ice attacks, avoid fire ones and vice-versa).


Koume and Kotake, spiritual mothers of Ganondorf, are defeated. Astonished and angry at their deaths, they start arguing before ascending to heaven. Go take the heart on a small platform and enter the circle of light. Nabooru then welcomes you to the Chamber of Sages and apologizes for attacking you while she was under the control of the sorceresses. She gives you the Spirit Medallion but you will have to wait for the kiss.


Buldo6 & Perfectdams translated by Gemini
| Back to Zelda Ocarina Of Time Master Quest homepage |
| Back to Nintendo 64 home |
- Français -- العربية -- বাংলা -- Deutsch -- English -- Español -- हिंदी -- Italiano -- 日本語 -- 한국어 -- Português -- Русский -- 中文 -