Zelda II - The Adventure of Link (Zelda 2) Walkthrough on Nes: Donjon 7 - le Great Palace
map of the Great Palace

After all these adventures, here we finally are at the Great Palace, which is much bigger and harder than the previous ones. It is the only true labyrinth; in the other palaces, you had to search pretty much everything whereas this one features a few dead ends and a large "loop". This walkthrough will lead you directly to the final boss of the Great Palace. Watch out because the new monsters are hard to beat, and the old ones are tougher and often shoot fireballs instead of "normal" shots, do not hesitate to flee from fights. I will tell you when to use the shield magic (each time it is only advice), this corresponds to the places where in my opinion you lose the most health points. Before starting the palace, make sure you have the "thunder" magic.
Start by going to the right, the 6 crystals placed on the 6 steles will make the magic barrier disappear (1), continue your way and go down the elevator. Use the "shield" magic and head to the left (2). You will encounter a firebird, a critter that makes small jumps and casts flames in an arc. These pass over you but some return to you after touching the ground, I advise beating it by advancing and hitting (3), try to do this quickly so you don't get hit by the flames returning (or continuing) towards you (at worst, jump). This enemy is quite resistant so you can also jump over it and continue your journey so as not to lose too much health.


Climb on the blocks to take the upper path, a piece of the floor you are walking on is fake and you will have to jump over it. Fortunately, the designers provided a landmark; to pass over the hole that cannot be seen, you just need to jump at the level of the statue located below (1). Continue your way, go down via the elevator and head to your right (2). Cross the bridge over the lava then the large room and kill or jump over the firebird blocking your way (3) to go down with the elevator.


Cross the next room by breaking blocks and killing dragon heads, preferably with the down attack (1). Continue to the right until you change rooms. There, use your shield magic for your first confrontation with another new enemy, the dreadhawk. This one is a kind of upgraded ironknuckle. It throws swords and parries your attacks with its shield, it goes very fast and jumps very high, when you don't cross it in a low-ceiling passage, it will be easy to pass underneath and flee (or try a high attack (2)). If the ceiling is too low, parry its swords and strike at the right moment, it has little health (2 hits are enough at attack level 8) but it hurts quickly and is not easy to hit. After the fight (or flight), continue to the right and take the elevator. Exit the elevator to the right, kill the firebird (3) and continue to the right.

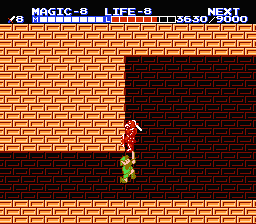

You arrive facing a rope that throws fireballs, no need to use reflect, hurry up to deal a down attack (1) and do the same for the dragon heads and the other ropes that populate the room. At the end of it, use the "Jump" magic to go get a red potion (2) by hitting the statue (beware, a red dreadhawk may appear instead). After healing yourself (if needed) and taking the potion, use the elevator. Go to the right and destroy the blocks in such a way as to make a staircase allowing you to easily kill the blue dreadhawk. Being a bit above the ground when exiting the block pile, you can kill it simply by crouching and hitting it the moment it jumps on you (3). Be careful not to go past the right of the blocks located below you. Once the baddie is eliminated, continue to the right.


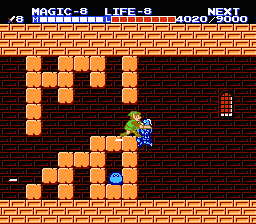
In this large room, try to kill the 2 big skulls (with the down attack (1)) before facing the firebird which shouldn't pose too much problem on a flat floor. Continue further right and try to pass under the blue dreadhawk and cross the room running (turn around if necessary to parry swords), quickly dig into the blocks and go take the elevator. Go right to take the fairy by carving a staircase with your sword (1) then go left of the elevator to go get a life. On the way there as on the way back, take your time and let the bots throw themselves into the lava trying to attack you rather than trying to jump when these critters are still on the platform opposite. Come back to the elevator and go down.


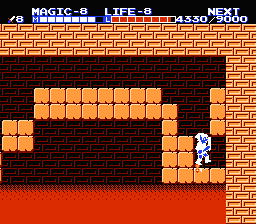
This time head to the left, kill the bot and the firebird and continue left. Break blocks towards the left of the series of blocks to pass through the floor (1). Go to the right and do a high attack on the giant bot that jumps on you, kill the small bots if you want then continue to the right. Cross the collapsing bridge up to the small chimney coming out of the lava and let yourself fall from the bridge into this narrow vertical tunnel. By going left you can find 2 red potions (or red dreadhawks) to fill up on life and magic. Once this is done, go right and get ready to face the boss.


Thunderbird is a sort of big bird making me think a bit of quetzalcoatl. At the beginning, you cannot touch it, you must first use the "thunder" magic. This will make it change color and you can then hit it by aiming at the head (you must strike, high and low attacks do not work). It hurts very badly so don't forget to use "shield". To hit it more easily, I also advise you to use "Jump" because it often flies very high. If you have all your magic, start by casting "shield" and "jump" then prepare "thunder" before making Thunderbird appear by going all the way to the right. This boss throws lots of small things at you, try to avoid them and jump to hit it in the head when it passes over you. As long as it's possible, try to stay in the middle to have more escape possibilities, try to reposition yourself as much as possible on the blocks before trying to touch it.
The boss yields 1500 and leaves a key, the adventure is not over yet, go right.


The second boss is much easier than Thunderbird, use shield entering the room and advance. You will see an old man with a triforce wave his cane and Dark Link will appear. As soon as he stands in front of you, go put yourself in the left corner, stay standing and hit constantly. If he jumps on you and hits you, reposition yourself in the corner and start hammering away while standing. You should get through it without too much trouble and fairly quickly. If you have almost no health points left, crouch down right at the start of the fight and strike constantly, Dark Link failing to get close will then make jumps over you. Turn around when he jumps over you and continue to hit to get him at the moment he touches the ground, you will win the fight without losing life if you press fast enough on the button when dark link is in front of you. With this technique, you must press fast permanently and you will have fewer relaxation moments.


Dark Link is defeated, go see the epilogue.
Perfectdams & Dark Alucard translated by Gemini
| Back to Zelda II - The Adventure Of Link homepage |
| Back to Nes home |
- Français -- العربية -- বাংলা -- Deutsch -- English -- Español -- हिंदी -- Italiano -- 日本語 -- 한국어 -- Português -- Русский -- 中文 -